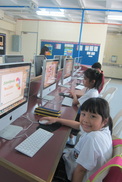
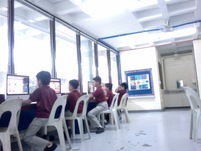
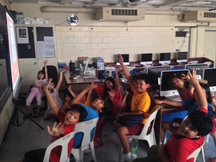
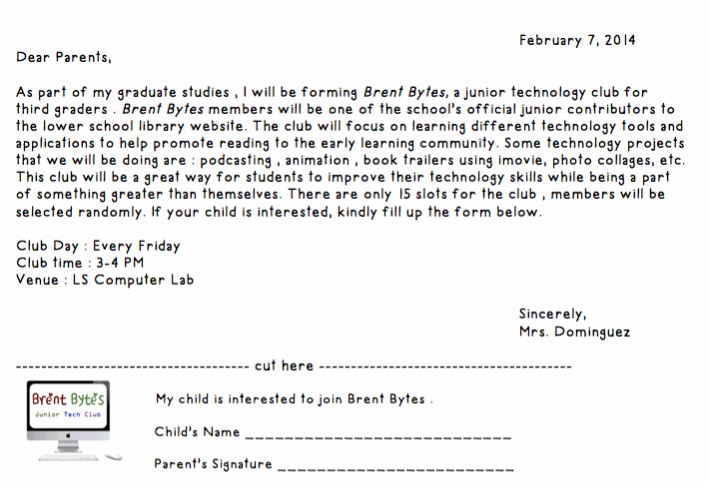
Brent Bytes went like a breeze today! When the third graders entered the computer lab, they knew exactly what to do. They went ahead and edited their -e-books - this time focusing on design and last revisions. This project, was again another success! I can't wait to finally publish these e-books to the ELC community and have younger students use this project as a supplement to their reading readiness program! Kuddos to my awesome third graders! Read away...!
And we're back from spring break.... Everyone's ready to begin working on their E-book projects. What's nice about the way this project was designed is that there is a template that can be edited. Having a template, especially for third graders, is very useful. With only an hour to work on the project, kids could get caught up in the crazy world of theme choices, fonts, design, etc. and before they know it , time is already up! With the e-book template, kids have a format to use but still have the freedom to change fonts, colors, backgrounds and images. I am looking forward to see their final products next week! Just before Spring Break officially started, I launched our new project for the Early Learning Center - EBOOKS! Everyone was excited and interested to learn more about the project and how to create it. I started the session by asking students to recall the first time they were able to construct sentences in Kindergarten. It didn't take long before the classroom burst into buzzing conversations. I introduced EBOOKS to the group as a tool to help kindergarteners build sentences. I also emphasized that the Ebooks will also be used by teachers and parents as supplementary learning materials to teach the students. This news made the Brent Bytes members more excited! I showed everyone an example of the Ebooks they will be creating in Powerpoint and then they all got back to their seats to do the first part of the project - brainstorming! It was a very productive meeting, I am looking forward to begin creating the ebooks when we come back from spring break! Chris Toy is known in the international school scene for providing excellent workshops on leadership, teaching and learning and technology. I was really excited to sit in one of his workshops that talked about Effective Technology Integration. In the workshop, he shared 3 models of technology integration as described by the ISTE - TPCK (Technology, Pedagogy, Content, Knowledge) model, SAMR (Substitution, Augmentation, Modification, Redefinition) and TIM (Technology Integration Matrix). In this blog entry, I will highlight the TPCK model just because I feel that it is the simplest model of Technology integration that any teacher can follow. In our school, technology is still taught as a separate class so using this model in daily lesson planning will really be beneficial especially for teachers who are new to the concept of integration. TPCK model of integrated teaching In a nutshell, PCK is the integration of your knowledge of subject matter content with a pedagogical knowledge of teaching and learning while T is the integration of technology into the subject. The four components of TPCK starts with a teacher deciding why this subject matter is important to teach, and how a teacher can use technology to enhance the learning. Secondly, teachers must have a plan of how the lesson will come together with technology. The next component is a teacher must know what the students already know and how they think, to learn with technology. Lastly, a teacher must have knowledge of curriculum and the materials that merge "technology with learning in the subject area. In essence, when a teacher plans a lesson, it needs to be thought out thoroughly with the use of technology. The students are growing up in an age where it will be hard to get a job without computer experience. The opportunity to use technology opens doors to their future in this age of information. (Johanna Mayer) During the workshop, Chris asked us to think of any subject content that we had taught or will be teaching. Then, he told us to choose one learning pedagogy we would like to use to teach our content. Lastly, he asked us to choose one technology tool that we think could help us enhance our teaching. He gently reminded us that technology does not replace teaching, it enhances ones teaching. The TPCK model gives teachers a way to restructure the way lessons are planned. This is a very useful table to use when planning: Some examples that the participants came up with were: 1. Teaching about space using demonstration and enhancing the lesson by skyping with an astronaut from NASA. 2. Teaching the Spanish language using simulation and enhancing the lesson by letting students create video tutorials in Spanish. 3. Teaching Hygiene in health education through lecture and enhancing the lesson by letting students create a photo essay on hygiene problems and tips throughout a school day using their digital camera. 4. Teaching weight lifting through demonstration and enhancing the lesson by letting students create an ebook on weightlifting tips to upload on public websites. The TPCK model is so simple and easy to use. I really like that it pushes teachers to make connections and dig deeper into effective integration. I cannot wait to share this information with my colleagues! One interesting session I attended in the conference was on coding in the elementary level. This was a really good choice of workshop to attend because of its relevance to the way the world is shifting. Whether or not our younger students turn out to be computer geniuses in the future, coding is still an essential skill for them to learn. It teaches abstract problem-solving, creativity, computational thinking and communication skills. Where does one start? The first thing you have to do as a classroom teacher or a tech coach is TO LEARN IT FIRST. Our workshop facilitator told us the story of how she began coding. She's a 5th grade teacher who had zero background on coding. One day, while on maternity leave, her husband told her matter-of-factly that he watched a youtube video about coding and he thought she should be teaching it to her 5th grade students. She watched the video and was challenged by the fact that she can actually bring coding to her classroom - but the big question was- HOW? She researched a lot on her own and enrolled herself in an online Coding Academy. As soon as she had the basic know-hows, she immediately introduced coding to her students. According to her, it was one of the best decisions she has ever made. The impact coding had on her students was tremendously positive! How does one introduce it to children? We know that Coding is creating a sequence of instructions to enable the computer to do something but when we introduce coding to elementary students, it is important that it is presented in the most basic way. One way to introduce coding is by doing a role playing activity with the students. The teacher takes on the role of a computer and the students will be the programmer. The goal is for the teacher to be able to draw a square on a chart paper based on the commands that students give. Through this activity, students will be able to figure out that computers don't actually think and it only does what the programmers tell them to do in a language that the computer understands (which we call codes) . They will also realize that computer language is different from human language - it is more specific and involves a lot of math! When can one integrate coding? Anyone can be a coder. Coding can be taught to children as early as in kindergarten. It can be introduced and integrated into any lesson. Exposing kindergarteners to the basic logic of programming and giving them an opportunity to experiment with different ways of solving problems will equip them with skills they can build upon to become future webmakers, creators, and future designers of creative technologies. What software can I use to teach coding in the early years? There are a lot of softwares and programs that can be used to teach coding. Here are some great links: More book trailers were done today! Some of the students decided to create new ones- what's great about it is that this time, it only took them 20minutes! It goes to show that they are getting more comfortable using the program!
My students could not stop thinking about iMovie ! The whole day today they kept on talking about Brent Bytes and how they were looking forward to start working on their book trailers. Before the session started, I prepared a slideshow tutorial on creating a book trailer for the kids. It really helped them understand instructions. I'm so glad that they picked it up right away. I feel that the kids now are way to advanced - my presentation only covered the basics of imovie such as : starting a new project, choosing a design, adding images and text. The students played with the application for a few minutes then after a while they were already asking me about transitions, text editing, adding music and working on frames. I was really taken aback by their curiosity and genuine interest in using iMovie. Before I knew it, an hour has passed and it was time to go home. You can just imagine how sad the kids were - they all wanted to still work on their projects! I assured them that they will be able to finish their book trailers next week. What a great way to end my week! POINTS FOR IMPROVEMENT: 1. When I made my slide show presentation , I assumed that the students will be using the same iMovie version as my Macbook Pro's. However, this was not the case. The iMovie in the computer lab's iMacs was a later version so I had to make adjustments on the spot. At one point, I just had to demonstrate some functions using one of the iMacs. Next time I will do a test run before the session and check on compatible versions as well. 2. My students pick up applications pretty fast. I need to be more prepared with their questions next time. On Fridays, students are usually in a rush to go home after 4th block, excited to start the weekend- but not today! Today 12 third graders headed to the lower school computer lab right after school. I was there, waiting- ready to begin my first session of the much awaited Brent Bytes! I started the first part of the session with an introduction to the club. I prepared a slideshow to talk about what it is, its goals, projects and timeline. Beginning our first project - Book TrailersAfter the introduction, I went right ahead and discussed our first project, book trailers. We talked about what book trailers were, why they even exist and why we needed to make this for the younger members of our community. All the How-to's will be discussed in our next session, when we begin using the macs. We defined book trailers as a video advertisement for a book which is used to motivate young readers to read more books. For this project, students will be working in pairs. We headed to the library which was just across the computer room. The first task I gave the students was to pick a book of their choice to do their trailer on based on the ELC's unit theme this month (farm animals,creepy crawlies, insects). The kids were so excited while choosing books. They were so busy asking each other questions like, "Do you think they would like this?" "Can we make this look exciting in a book trailer?" "Is this too hard/easy for them?" "What books are interesting for 4 and 5 year olds?" After students had selected their books (most of them picked books that they have read in the past), I gave everyone about 5 minutes to reread the books to refresh their memories. Then, I met with them to talk about creating scenes for their book trailers. Since it will be their first time to create a trailer, I limited the number of scenes to 6 . I also provided them with a sample format which they can freely use to suit their needs. Check out the sample I made and some of the kids' scenes.
|
Brent BytesA junior technology club for third graders that aims to use various technology tools to help foster a love of reading to other students. Archives
May 2014
Categories |